
")
There are moments in life when bigger is actually better, especially when it comes to Mac screens. Over the years, Apple has offered displays in a variety of sizes, from the 11-inch screens found on MacBook Air models of the past to the 16-inch MacBook Pro models of the present. While Apple has introduced many ways to get a larger screen, whether through your iPad (via Sidecar) or via an external monitor, a TV screen is one of the best ways to get a huge screen for your viewing needs.
Advertising
In 2024, you can get pretty big smart TVs for under $500. Plus, there are even some pretty unique TV models on the market that will make whatever you want to share from your Mac look more awesome than it does on your laptop screen. With a TV, you can either mirror whatever’s on your Mac or extend your Mac screen so you can keep working out of view. Whether you’re sharing photos and videos from your last vacation or showing your clients the latest version of the deck you’ve been working on, there are many benefits to using a TV as a large Mac display.
There are two ways to connect your Mac to a TV: wirelessly and wired. Depending on your preference, you can use either method to connect your Mac to a TV with a display.
Advertising
Wireless
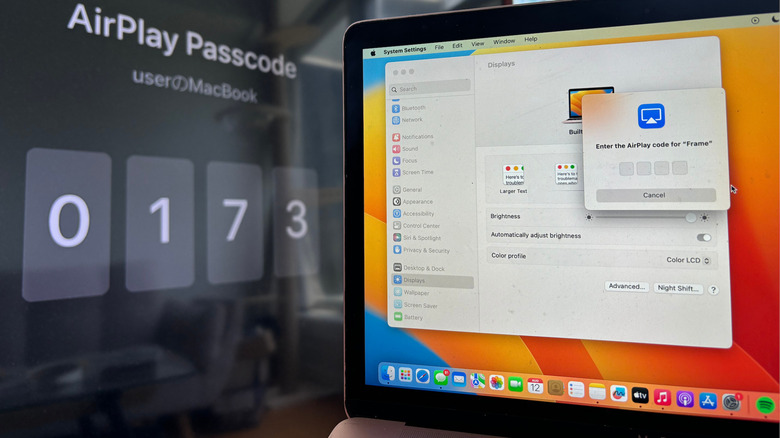
The easiest way to connect your Mac to a compatible smart TV is to use AirPlay. These days, many smart TVs already offer AirPlay functionality built-in. To find out if your TV is AirPlay-enabled, you can check the list of Apple Home accessories or consult your specific TV’s manual or the manufacturer’s website. After making sure your Mac and smart TV are connected to the same stable internet connection, here’s how to set them up.
Advertising
-
Option 1: On your Mac, click the Apple icon and choose System Preferences. Click Displays in the left sidebar, then click the plus (+) icon next to your Mac name.
-
Option 2: Click the control icon in the top right corner of your screen and select Screen Mirroring > Display Settings.
-
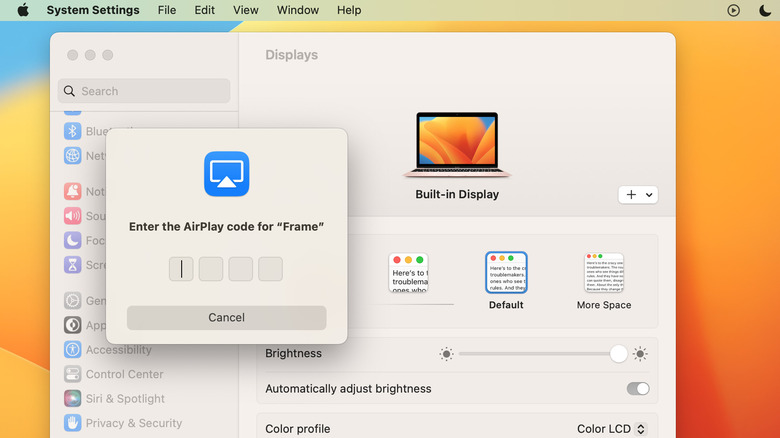
Enter the four-digit code displayed on your TV screen into your Mac to confirm pairing.
If you encounter any issues while using AirPlay, try moving your Mac and TV closer together, updating their respective firmware, or restarting them. If you find that your smart TV is not AirPlay compatible, you can use streaming devices like Apple TV 4K, Roku, or Google Chromecast to do something similar. Aside from streaming from your Mac, there are many benefits to using Google Chromecast even if you already own a smart TV. If you’re having trouble casting your iPhone screen to your smart TV, you can check out our troubleshooting guide to get it working again.
Advertising
Wired
Luckily, if your Smart TV isn’t compatible with any of the existing wireless options, you can use a wired connection. And if you also have a weak internet connection or are experiencing a lot of signal interference, a wired connection can be a more stable alternative. To do this, you’ll first need to connect your Mac to your Smart TV using the appropriate cable. Depending on your TV, you may need to go through some additional setup procedures. For example, with the Samsung Frame TV, you’ll need to select the device type, which is important because it can help recommend settings.
Advertising
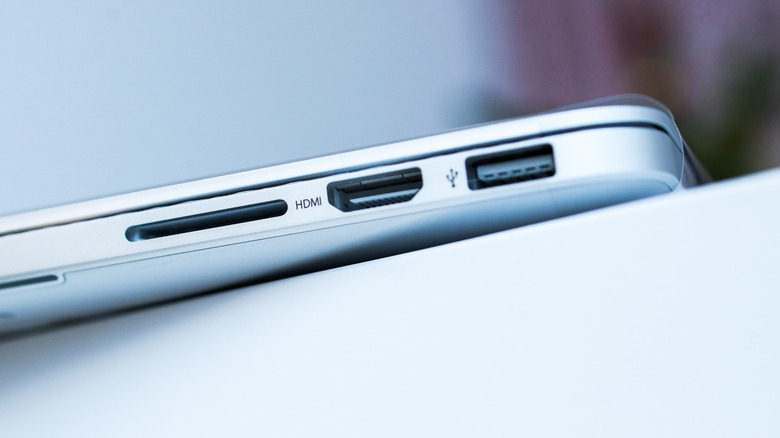
If your Mac doesn’t have an HDMI port and you need one for your TV, you can buy an adapter or dock, such as the Apple USB-C Digital AV Multiport Adapter ($69). While there are plenty of third-party options, it’s important to know that they may not always be up to standard or have compatibility issues. Additionally, it’s important to know that there’s more than one type of HDMI cable. To get the most out of your Mac and TV connection, you’ll want to go with HDMI 2.1, especially if you’re using a TV with a 120Hz refresh rate. Thankfully, you can also snag the 2-meter Belkin UltraHD High Speed 8K/4K HDMI Cable ($29.95) or the Belkin 4K mini DisplayPort to HDMI Cable ($59.95) from the Apple Store, which have been tested for Mac compatibility to the standard.
Advertising
How to fix if your Mac screen doesn’t fit your TV display
In terms of settings, it’s important to note that every TV is calibrated differently. If you successfully connect your Mac to your TV but find that the display isn’t right, this can manifest itself in two ways: overscan and underscan. With overscan, parts of the screen projected onto the TV aren’t displayed properly. For Mac users, this usually manifests itself in the menu bar or dock disappearing or being cut off. With underscan, on the other hand, you can see the entire screen but see black boxes at the top, bottom, or sides of the display. Here’s how to fix overscan or underscan.
Advertising
-
On your Mac, click the Apple icon in the top left of your screen.
-
Select “System Preferences”.
-
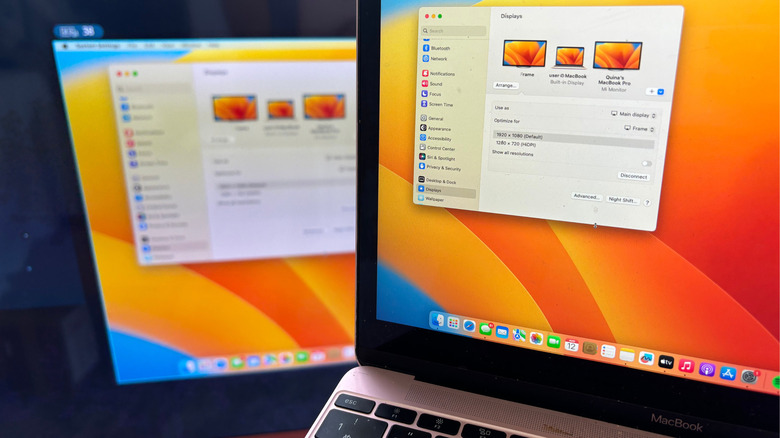
Click on “Displays” in the left sidebar.
-
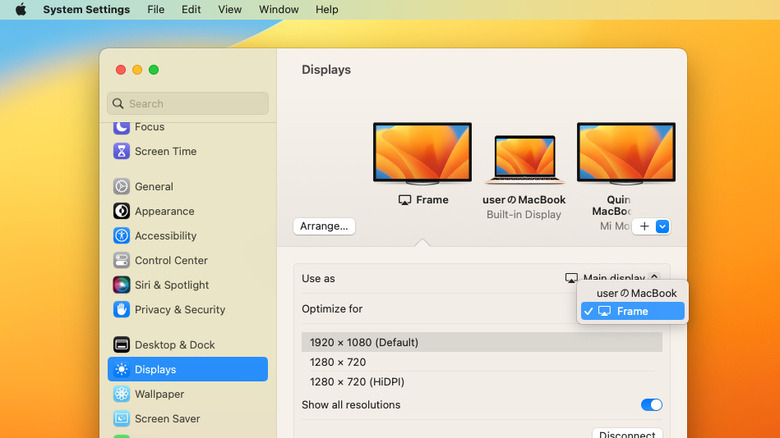
Click on your Mac next to Optimize and select your TV name from the options provided.
Alternatively, you can experiment with the screen resolution on your Mac. Enable the button next to “See all resolutions.” Then try out the different options to see what works best for your TV. If adjusting your Mac settings doesn’t work, you may need to adjust the picture settings directly on your TV screen. Depending on your TV model, the location may vary, but you’ll usually find it in the Settings or Display section.
Tips to better display your Mac screen on your TV
In some cases, getting your Mac screen to show on your TV is only half the battle—the other half is making sure it looks and sounds right. Fortunately, there are a few things you can change on any TV to improve the viewing experience. First, placing your TV in a location out of direct sunlight can help reduce glare, making your Mac’s streamed content easier to see. If you don’t have any other location options, you can manually adjust the brightness to get a better view of the projected screen. Here’s how to do it on your Mac:
Advertising
-
On your Mac, click the Apple icon.
-
Select “System Preferences”.
-
Click “Display” in the left sidebar.
-
Choose your preferred resolution.
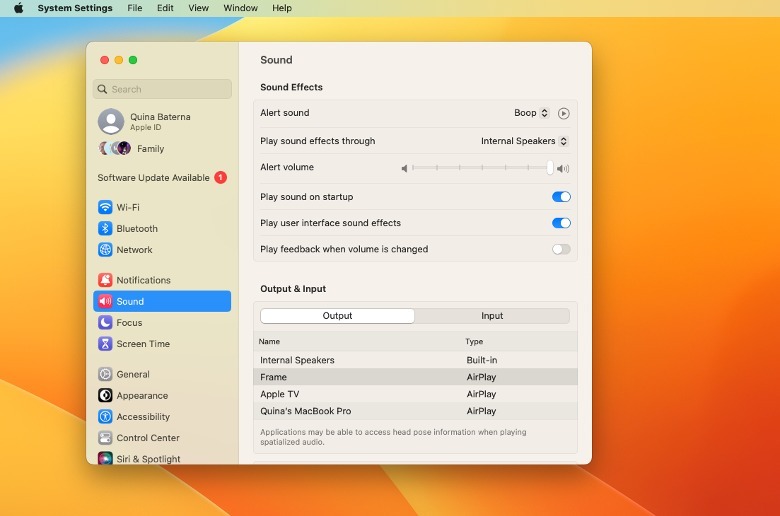
The Display section also lets you choose whether you want to use your screen as your main display or as a mirror. Plus, if you want to take advantage of your TV’s fancy sound system, you can also change where your audio plays.
 Quina Baterna/SlashGear
-
On your Mac, click the Apple icon.
-
Select “System Preferences”.
-
Click “Sound” in the left sidebar.
-
Click “Output” > “Your TV Name”.
Alternatively, you can use an external speaker setup if you’re more comfortable with that. If you’re not sure how to choose the right speaker setup for you, you can check out our team’s rankings for every major surround sound brand based on customer reviews.
Advertising


